What is Setup Resources in Magento
What is Setup Resources in Magento?
Setup Resources are a part of your magento extension that will get executed as soon as your extension will get installed. To understand it better we can take an example:
Suppose you are creating an extension for “dealer management”. For storing your dealer details you must require a “dealers” table in your database. This table will contain all of your dealer details.
In order to meet this requirement you can follow two ways:
- You should provide sql query that must be run manually
or
- You should put this sql under setup resources of your extension such that as soon as your magento extension gets installed it should automatically create database table in current database.
At a conclusion: Setup resources are container of code that needs to be executed at the time of extension setup on web server.
Pre-Requisite :
*. Here we assume that you already have knowledge of custom magento extensions.
*. This article is for magento 1.7.x only. It might change for future version of magento.
In todays article I will cover only about “Altering database through setup scripts”.
Below are the necessary changes that needs to be done into your custom magento extension:
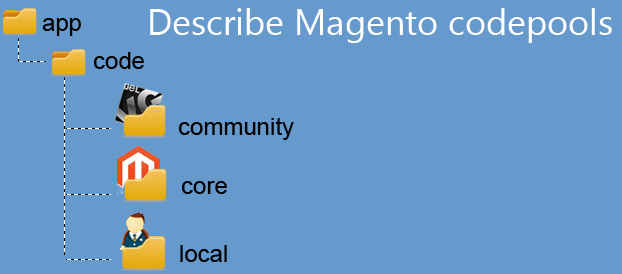
- For any kind of database manipulation through custom extension you need to create “sql” folder on the root path of your custom extension (i.e., app\code\local\NameSpace\CustomExtn folder)
- Create a setup folder called customextn _setup under sql folder.
- Create an install script under customextn _setup folder with name like mysql4-install-0.1.0.php where 0.1.0 is the version number written into config.xml file. And write below script into it.
<?php

$installer = $this;

$installer->startSetup();

$installer->run("

-- DROP TABLE IF EXISTS {$this->getTable('custom_table')};

CREATE TABLE IF NOT EXISTS {$this->getTable('custom_table')} (

`id` INT UNSIGNED NOT NULL ,

`sku` varchar(64) NOT NULL ,

`customer_id` INT NOT NULL ,

) ;

");

$installer->endSetup();
- Below code need to add resources code into app\code\local\NameSpace\CustomExtn/etc/config.xml .
<resources>

       <customextn_setup>

           <setup>

               <module>NameSpace_CustomExtn</module>               <class>NameSpace_CustomExtn_Model_Resource_Mysql4_Setup</class>

           </setup>

                                    <connection>

                                                <use>core_setup</use>

                                    </connection>

       </ customextn_setup >

   </resources>
- Create a setup file under app/code/local/NameSpace/Customextn/Model/Mysql4 write below code into Setup.php file
class NameSpace_CustomExtn_Model_Resource_Mysql4_Setup extends Mage_Catalog_Model_Resource_Eav_Mysql4_Setup

{

}
How to run / re-run resource setup file: As soon as extension gets installed then magento creates a new row under “core_resource” table named “customextn_setup” with the version of install script. So you can take a look into database to make sure if that setup has been run so far or not.
Note: as soon as we open site on browser then magento looks for any new install script and compare it with any existing install script . If version number of this script is higher than older one then it runs again.
How to create update script :
If you have forget to make any changes during install script then still you can run an update script that will do remaining work. Update script file name is very similar to install script with minimul difference like
Name of install script: mysql4-install-1.0.0.php
Name of upgrade script: upgrade-1.0.0-1.0.1.php
Where 1.0.0 is intial version and 1.0.1 is new version. Make sure you also update your config.xml file. So that magento can identify what is current version of your upgrade and match it with install version.
Example of update database table using setup resource script (upgrade-1.0.0-1.0.1.php)
$installer = $this;

$installer->startSetup();

$installer -> getConnection() -> addColumn( $installer -> getTable( 'salesrule' ) , 'newref_id' , 'VARCHAR(50) DEFAULT NULL' );

$installer->endSetup();
Chandra Shekhar
Latest posts by Chandra Shekhar (see all)
- Best practices for micro service design - January 23, 2022
- Spring Boot - January 23, 2022
- Java - January 23, 2022
Recent Comments